> ## Documentation Index
> Fetch the complete documentation index at: https://docs.seyval.dev/llms.txt
> Use this file to discover all available pages before exploring further.

# 대시보드

> Seyval Dashboard 사용 방법

## 목차

* [리포지토리 설정](#리포지토리-설정)
* [분석 실행](#분석-실행)
* [코드 실행](#코드-실행)

***

## 리포지토리 설정

### 리포지토리 추가

GitHub 리포지토리 URL을 입력하고 **+ Add Repository**를 클릭하여 등록합니다.

<img src="https://mintcdn.com/aixs/KIcyjiZ7QpqCcdVw/images/repo-register.png?fit=max&auto=format&n=KIcyjiZ7QpqCcdVw&q=85&s=c715b1fcd13e77d9ac516ce796f6b2ad" alt="리포지토리 추가" width="715" height="96" data-path="images/repo-register.png" />

### 등록 후

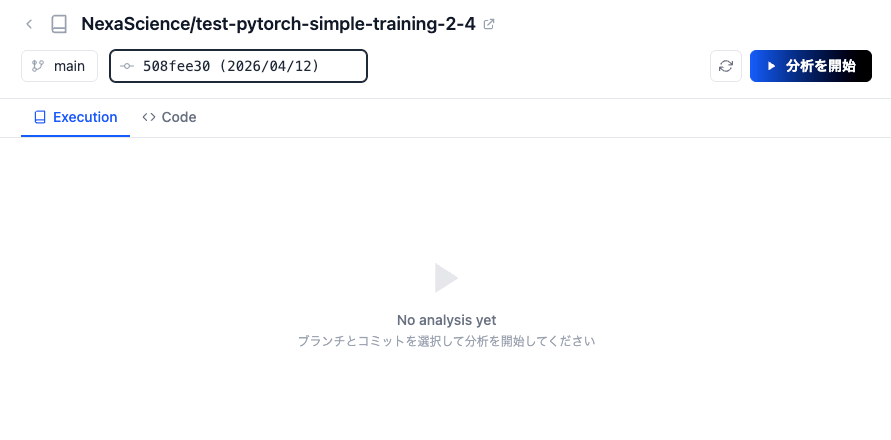
등록 후, 분석을 시작할 브랜치와 커밋을 선택할 수 있는 화면으로 이동합니다.
<img src="https://mintcdn.com/aixs/KIcyjiZ7QpqCcdVw/images/repo-after-register.png?fit=max&auto=format&n=KIcyjiZ7QpqCcdVw&q=85&s=de7b8ceaad6695ce231c470e1c313a24" alt="등록 후" width="891" height="440" data-path="images/repo-after-register.png" />

***

## 분석 실행

### 분석 시작

브랜치와 커밋을 선택한 후 **Start Analysis**를 클릭하여 리포지토리 분석을 실행합니다.

<img src="https://mintcdn.com/aixs/KIcyjiZ7QpqCcdVw/images/analyze-button.png?fit=max&auto=format&n=KIcyjiZ7QpqCcdVw&q=85&s=373b98f8ebbf855f43589dec2fdba262" alt="분석 시작" width="191" height="59" data-path="images/analyze-button.png" />

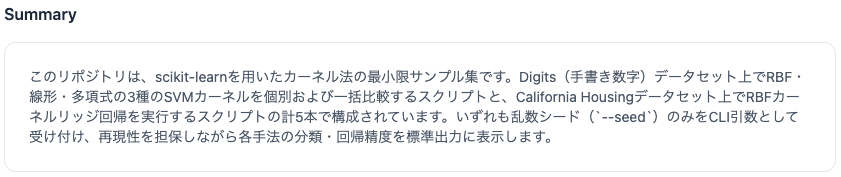
분석이 완료되면 다음 두 가지 항목이 생성됩니다.

### 요약

리포지토리 내용을 기반으로 코드의 요약과 설명이 자동으로 생성됩니다.
<img src="https://mintcdn.com/aixs/KIcyjiZ7QpqCcdVw/images/analysis-summary.png?fit=max&auto=format&n=KIcyjiZ7QpqCcdVw&q=85&s=7ed61a98aa2e0d9cc563d0fa27dae288" alt="요약" width="841" height="177" data-path="images/analysis-summary.png" />

### 실행 목록

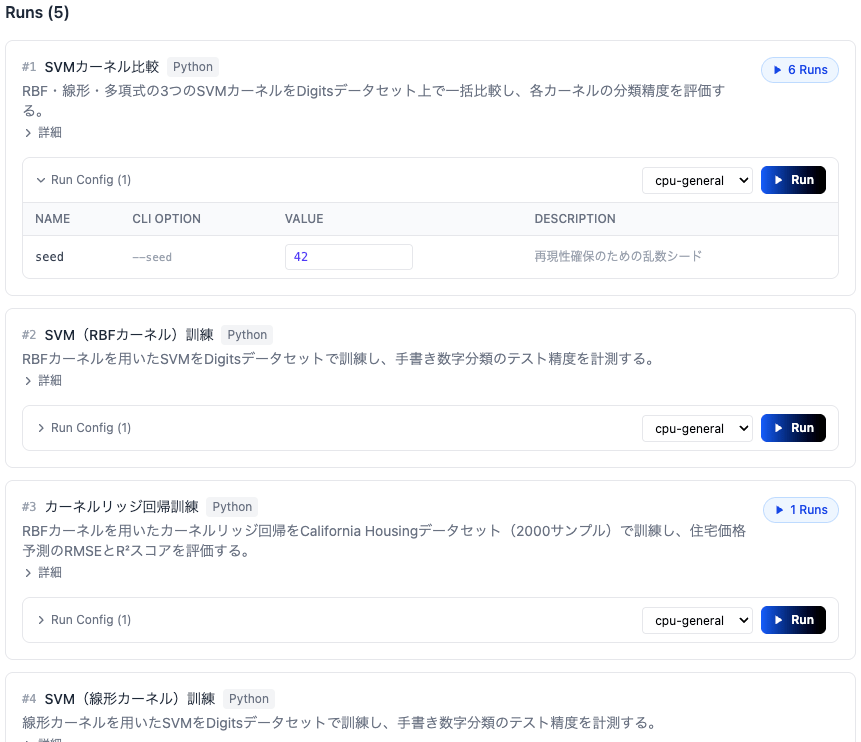
리포지토리에서 발견된 실행 가능한 엔트리 포인트 목록이 생성됩니다. 각 엔트리 포인트에는 설명, CLI 옵션, 컴퓨트 환경 설정이 포함되어 있으며, **Run** 버튼으로 직접 실행할 수 있습니다.
<img src="https://mintcdn.com/aixs/KIcyjiZ7QpqCcdVw/images/analysis-entrypoints.png?fit=max&auto=format&n=KIcyjiZ7QpqCcdVw&q=85&s=69f9ec65acbeb535d1e540781a294ef3" alt="실행 목록" width="861" height="742" data-path="images/analysis-entrypoints.png" />

***

## 코드 실행

### 엔트리 포인트 카드

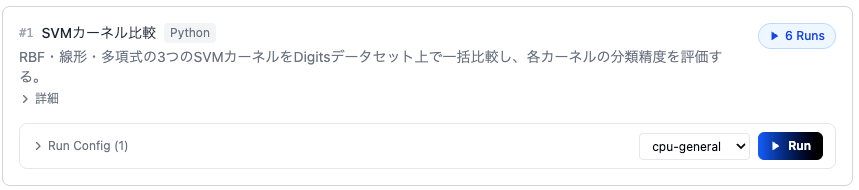
실행 목록에서 실행하려는 엔트리 포인트 카드를 선택합니다. 각 카드에는 엔트리 포인트 설명과 실행 구성이 표시됩니다.
<img src="https://mintcdn.com/aixs/KIcyjiZ7QpqCcdVw/images/entrypoint-card.png?fit=max&auto=format&n=KIcyjiZ7QpqCcdVw&q=85&s=f3327e4ce3e80faa4845b3ce08de6439" alt="엔트리 포인트 카드" width="859" height="190" data-path="images/entrypoint-card.png" />

### 실행 구성 변경

**Run Config**를 확장하여 CLI 옵션 값을 변경하고 컴퓨트 환경(Compute Type)을 선택합니다.

<img src="https://mintcdn.com/aixs/KIcyjiZ7QpqCcdVw/images/run-config.png?fit=max&auto=format&n=KIcyjiZ7QpqCcdVw&q=85&s=80a3339b3d4961834dfa9cbdb6bcfc83" alt="실행 구성 변경" width="806" height="133" data-path="images/run-config.png" />

### 실행

구성이 준비되면 **Run** 버튼을 클릭하여 실행을 시작합니다.

<img src="https://mintcdn.com/aixs/KIcyjiZ7QpqCcdVw/images/run-button.png?fit=max&auto=format&n=KIcyjiZ7QpqCcdVw&q=85&s=c0327998b3ee53a3b41a107501cbc201" alt="실행" width="73" height="40" data-path="images/run-button.png" />

### 실행 모니터링

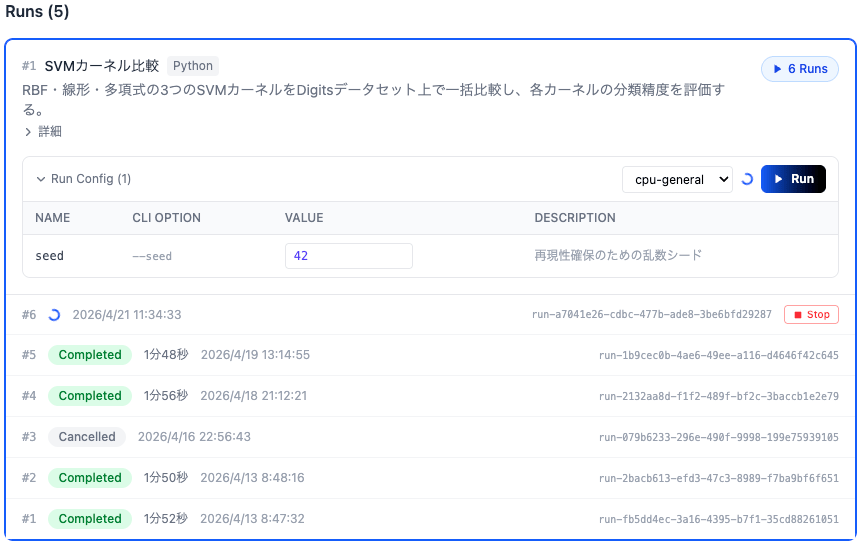
실행이 시작되면 카드 하단의 실행 목록에 새 Run이 추가됩니다. 실행 중에는 상태가 실시간으로 업데이트됩니다.
<img src="https://mintcdn.com/aixs/KIcyjiZ7QpqCcdVw/images/entrypoint-run.png?fit=max&auto=format&n=KIcyjiZ7QpqCcdVw&q=85&s=38eebb15e40fd09272f02e78bab24a59" alt="실행 모니터링" width="862" height="545" data-path="images/entrypoint-run.png" />

### 실행 상세

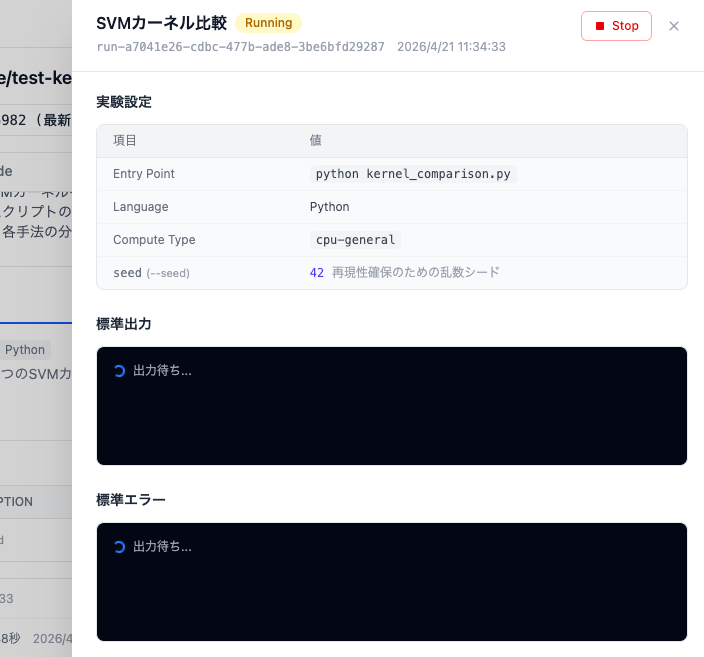
실행 중인 Run을 클릭하면 실험 설정, 표준 출력, 표준 에러를 실시간으로 확인할 수 있습니다.
<img src="https://mintcdn.com/aixs/KIcyjiZ7QpqCcdVw/images/experiment-status.png?fit=max&auto=format&n=KIcyjiZ7QpqCcdVw&q=85&s=edd1fe40261f254c0bac75bc6bfa004c" alt="실행 상세" width="704" height="657" data-path="images/experiment-status.png" />

### 결과 확인

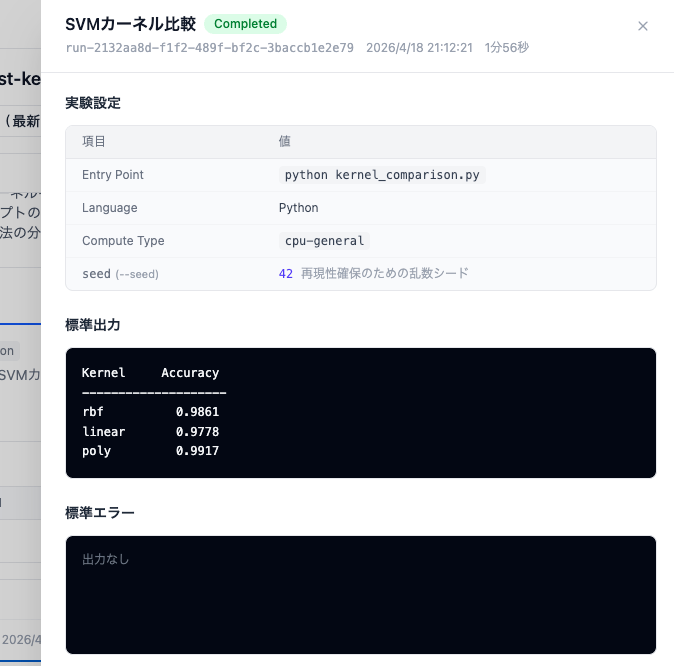
실행이 완료되면 상태가 **Completed**로 변경되고 결과가 표준 출력에 표시됩니다.
<img src="https://mintcdn.com/aixs/KIcyjiZ7QpqCcdVw/images/experiment-result.png?fit=max&auto=format&n=KIcyjiZ7QpqCcdVw&q=85&s=84977a867e8755bca5d5798d93ca90a5" alt="결과 확인" width="674" height="666" data-path="images/experiment-result.png" />
